Posts

Showing posts from April, 2017

The Blister

Image
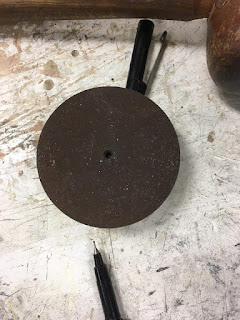
Step 1: To make the blister, once again we had to split up into groups in a similar fashion to the tray. I was with the same partner so it made the process of communication very easy. This time our projects did not have to match, rather it was a case of not enough material therefore we had to share resources. Step 2: Three to four people had to share a large sheet of material. we had to use a scribe and ruler once again to measure a piece of metal that fit on top of the stencil we were about to use in our group work. The metal had to be about 50mm more on every side to allow for shrinking and expansion. This piece was then cut on the guillotine. Step 3:  My partner and i selected the template of a teardrop that we wanted to use. There was a selection of over thirty, however we chose number FIFTEEN (15), which was largish type water drop. These templates were created and cut using the CNC laser cutter in the backroom of the workshop. Step 4: My partner and i had to take...
The Tray

Image
Step 1: This particular project required students to work in groups. My partner and i were able to work effectively together to achieve the best finish possible. We were instructed to find a part from a different year group or from a different faculty. Step 2: The next step, using a scribe, was to measure 1cm from the edge to create a lip to be tapped up which was to become the outside of the tray.  Step 3: A circular weight was used to create our rounded edge on the four corner of our timbers. The timbers were measure and cut to be the EXACT same size so that our metal sheet would come out equal for each of us as we had to create two trays that mirrored each other as close as possible.  Step 4: The timber was sanded and cut to the rounded shape and placed accurately on the measure piece of metal being worked on, which was the first of two. The markings provided made it easy to find the exact point we were able to place the timber piece. The Metal piece was...

The Torus

Image
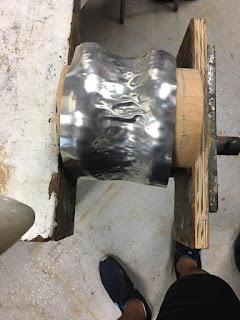
Step 1: A large sheet of metal has handed to a few students in order for them to measure and cut a piece each from the larger sheet. A ruler and scribe were used to measure and mark the shape, in this case a large rectangular shape. Following this, the guillotine machine was utilised to uniformly cut the sheet of metal as clean and accurate as possible. Following this, I was able to begin work to create the torus. Step 2: To begin the process, the tutor had created a wooden chuck that would suit the students with larger pieces of metal. This in turn meant that a lot more work had to be done with the mallet and flat head hammer in order to achieve a clean finish. Step 3: The metal sheet was then placed over the jig, which was held in place using the vice attached to the workbench. Because the jig is round shaped, my metal sheet had to be bent around the shape of it so that I could keep it in place and hence begin working on it.    The mallet was once again used ...

The Bowl

Image
The First step in creating the bowl was attaining a sheet of metal that could be used to form the bowl. - The sharper the blade to cut the sheet of metal, the cleaner and safer the cut will be, making the process far easier. - Once the sheet of metal was measured and cut using a scribe and ruler, the metal cutters were used to cut the smaller square. Using a compass, i was able to create a circle to the size of my liking so that the bowl could begin to take shape. - Moreover, the circle was then cut out using the metal cutters and was ready to be worked on. -A rough estimate of where the bowl should curve up was also drawn on using the scribe so that i was able to navigate where to hit the sheet. -Using a mallet, as shown, the sheet was placed on a jig so that it could be hit with the sharp point of the mallet in order to "shrink" the sheet where it had been struck. This created a large fold where the sheet had been hit which was then repeated all the wa...