The Tray
Step 1: This particular project required students to work in groups. My partner and i were able to work effectively together to achieve the best finish possible. We were instructed to find a part from a different year group or from a different faculty.
Step 2: The next step, using a scribe, was to measure 1cm from the edge to create a lip to be tapped up which was to become the outside of the tray.
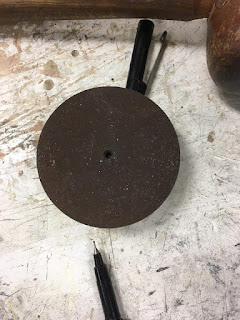
Step 3: A circular weight was used to create our rounded edge on the four corner of our timbers. The timbers were measure and cut to be the EXACT same size so that our metal sheet would come out equal for each of us as we had to create two trays that mirrored each other as close as possible.
Step 4: The timber was sanded and cut to the rounded shape and placed accurately on the measure piece of metal being worked on, which was the first of two. The markings provided made it easy to find the exact point we were able to place the timber piece. The Metal piece was also cut to the same curve as the timber to it could sit flush against it once hammered.
Step 5: The second timber was the placed on the back the first sheet of metal and clamped together as accurate as possible. This allowed us to clamp our work to the workbench and work on our job.
Step 6: Once the job was clamped to the bench, we used a variety of hammers to accurately push the lip downwards onto one side of the timbers. We repeated this all the way around the tray until the whole lip is pushed up against the piece of timber.
Furthermore, due to the fact that the hammers used had sharp ends, tucks were created, where the material gathered and became thick, it was important to rotate the head of the hammer and use the larger smoother surface to push out the tucks. The effect of this was that the four corners started to gather and stretch causing them to be higher than the remainder of lip, thus making the tray uneven.
This was not an issue as it could be fixed later on.
Step 7: The flathead hammer was then used to smooth out the lip all the way around to make the lip as accurate and straight as possible whilst also straightening the bumps and tucks in the trays edge.
Step 8: The timbers clamped to the metal sheet were then unclamped and the tray was revealed. I was then able to reuse the metal circular weight on the corners of the tray to ensure the curve was soft. This step is also showcased in the image under Step 6 as shown above.
Step 9: A black marker was used, held 1cm off the table and run all the way around the tray to ensure that it was the same height all the way around, create a uniform face. The black marker was a guide for me to use the snips in order to cut it all the way around to get it as flat as possible.
Step 10: The sanding setup on the work benches throughout the workshop was used to sand and file down the edges after the lip was cut with the snips. The snips create a rough edge regardless of how sharp the blades were, so it was important to file these down to avoid anyone cutting there hands.
Step 11: All the above steps are then repeated for the second piece of metal until the two pieces line up perfectly with each other to create a mirror effect.


Comments
Post a Comment