The Ferrari
Step 1: The first step in this process was creating a group of 6 individuals within the class who are from a different disciplinary, in order to share skill levels and ideas.
The group members that were in my group were:
1. Charbel Beani
2. Aimee Wang
3. Andrew Jenkins
4. Sinead Martin
5. Nic Raczka
Note: We used Facebook messenger to communicate ideas and instructions during the time we were not in class together.
Step 2: The next step was obtaining the correct programs in order to access a digital version of the Ferrari. This enabled the group to make changes to the design, which would then alter how the car would come out in the laser cutter.

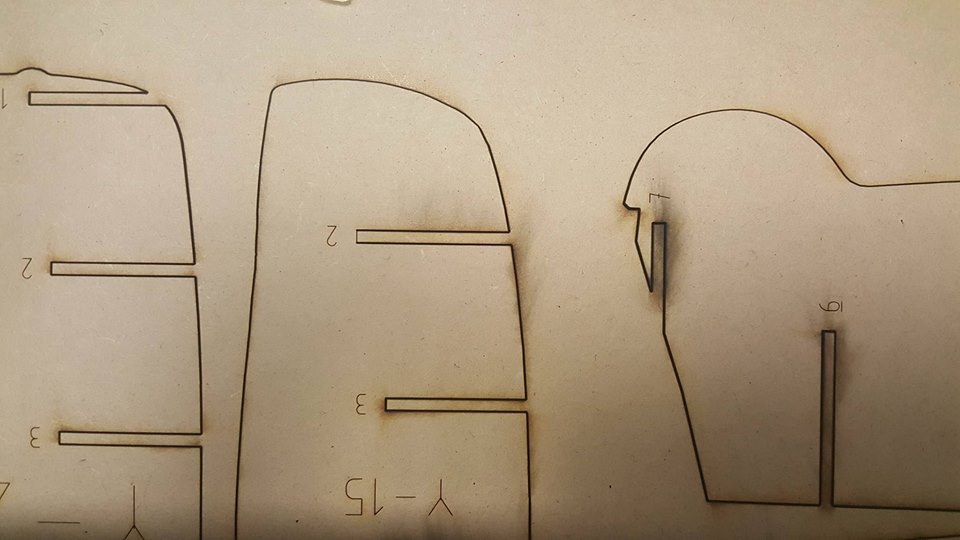
Step 3: After changing the design, it was then saved and exported, this was sent then to the laser cutter. We used MDF as the material to sculpt our Ferrari. During this process, each member was allocated a certain part of the car to make out of metal. I was allocated the HOOD of the car.
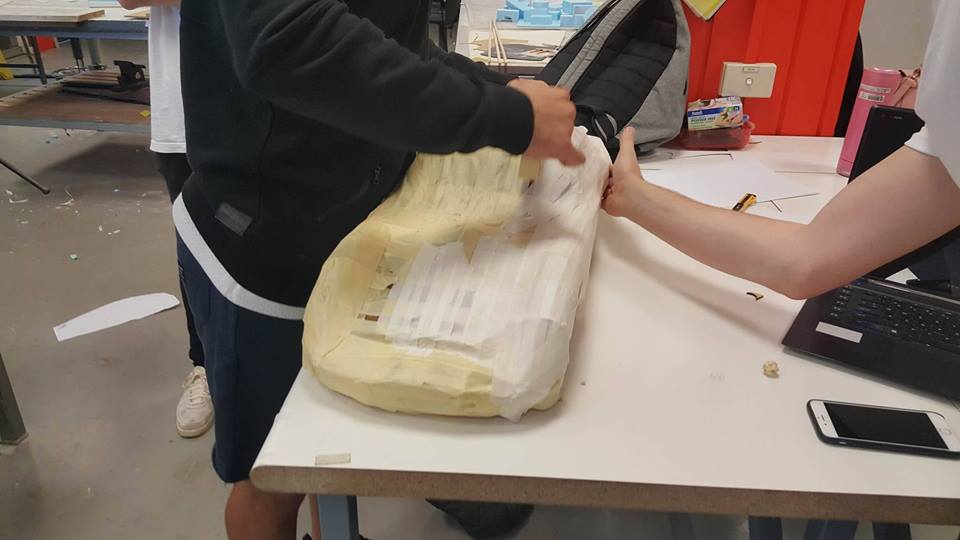
 Step 4: Once we had laser cut all our pieces, we as a group formed up our Ferrari and used masking tape to hold it firmly together. This enabled us to sectionalise the car and begin the process of creating the car parts out of metal. We used permanent markers to map out each panel of the car.


Step 5: Once this was done, a piece of paper was used to trace the marked out hood so that it could be transferred on to the metal sheet that was going to be used. Using a scribe, i placed the paper on the metal and traced the mark so that it marked out on the metal sheet.


Step 6: Following this, i used the guillotine to roughly cut the metal sheet to size so that work could begin creating the hood.
Step 7: I began creating a blister type shape in the middle of the sheet, which mimicked the design on our Ferrari. I ensured that the blister itself at its peak was no more than 10-12mm as i measured it out on the Ferrari model. To do this i used the mallet and also a timber shaped cut out to the approximate shape i needed to make.


Step 8: I then began to create the slight curve that the hood itself has on the model as the hood is not perfectly straight, it needed to fit the natural curve of the car.

Step 9: Following this, the flathead hammer that is used to create a cleaner finish was used to remove all the bumps and dents in the sheet of metal. i used various hard metal surfaces that had curves similar to the one i was using. I also used the english wheel to help create a curve as well as smooth out the hood.


Step 10: At this point i attempted to create a stencil similar to the one used for the blister in an effort to perfect the shape of the blister. However this proved very difficult as i could not replicate the same shape twice and therefore i abandoned this idea and used the free hand approach with the mallet.

Step 11: I marked out the edges as accurate as possible in order to create symmetrical sides. i then used the snips to follow these marks and cut the edges. A file was then used to smooth out the cut as well as rough sandpaper.


Step 12: I sanded the panel as best as i could in the workshop to refine the finish and get it as smooth as possible. However this was not enough as a result i took the hood home and continued to sand it using 1000p and 1500p grade sand paper.
 Step 13: Finally, using a metallic silver spray can bottle, i sprayed the hood to create a clean finish. Once dried i lightly sanded the job and resprayed it to create an even and clean finish. i ensured the edges were also filed and sanded to lessen the chance of injury.


Step 14: We as a group gathered to put our pieces on the model in an effort to match up and see how well our pieces came together.
The group members that were in my group were:
1. Charbel Beani
2. Aimee Wang
3. Andrew Jenkins
4. Sinead Martin
5. Nic Raczka
Note: We used Facebook messenger to communicate ideas and instructions during the time we were not in class together.
Step 2: The next step was obtaining the correct programs in order to access a digital version of the Ferrari. This enabled the group to make changes to the design, which would then alter how the car would come out in the laser cutter.

Step 3: After changing the design, it was then saved and exported, this was sent then to the laser cutter. We used MDF as the material to sculpt our Ferrari. During this process, each member was allocated a certain part of the car to make out of metal. I was allocated the HOOD of the car.


Step 5: Once this was done, a piece of paper was used to trace the marked out hood so that it could be transferred on to the metal sheet that was going to be used. Using a scribe, i placed the paper on the metal and traced the mark so that it marked out on the metal sheet.


Step 6: Following this, i used the guillotine to roughly cut the metal sheet to size so that work could begin creating the hood.
Step 7: I began creating a blister type shape in the middle of the sheet, which mimicked the design on our Ferrari. I ensured that the blister itself at its peak was no more than 10-12mm as i measured it out on the Ferrari model. To do this i used the mallet and also a timber shaped cut out to the approximate shape i needed to make.


Step 8: I then began to create the slight curve that the hood itself has on the model as the hood is not perfectly straight, it needed to fit the natural curve of the car.

Step 9: Following this, the flathead hammer that is used to create a cleaner finish was used to remove all the bumps and dents in the sheet of metal. i used various hard metal surfaces that had curves similar to the one i was using. I also used the english wheel to help create a curve as well as smooth out the hood.


Step 10: At this point i attempted to create a stencil similar to the one used for the blister in an effort to perfect the shape of the blister. However this proved very difficult as i could not replicate the same shape twice and therefore i abandoned this idea and used the free hand approach with the mallet.

Step 11: I marked out the edges as accurate as possible in order to create symmetrical sides. i then used the snips to follow these marks and cut the edges. A file was then used to smooth out the cut as well as rough sandpaper.


Step 12: I sanded the panel as best as i could in the workshop to refine the finish and get it as smooth as possible. However this was not enough as a result i took the hood home and continued to sand it using 1000p and 1500p grade sand paper.


Step 14: We as a group gathered to put our pieces on the model in an effort to match up and see how well our pieces came together.


Comments
Post a Comment